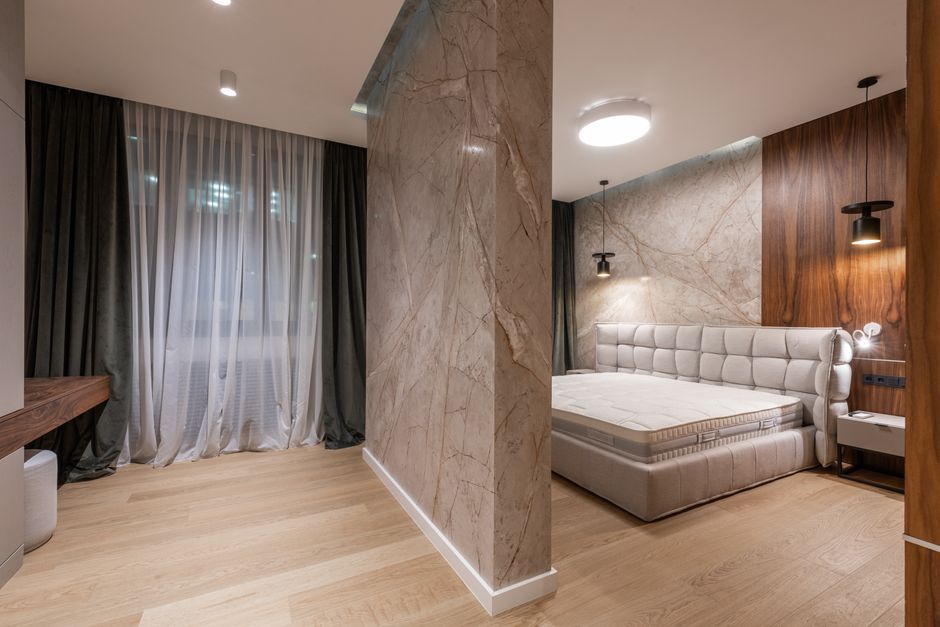
If you’ve ever been jolted awake by a neighbor’s bass-heavy playlist at midnight, or spent an entire work-from-home day listening to footsteps pounding through the ceiling, you already know the problem. Apartment living means shared walls, shared ceilings, and very little control over what comes through them. The good news? You don’t need to spend thousands of dollars or tear down walls to make a real difference. With the right materials and a strategic approach, you can dramatically reduce noise in your bedroom — even as a renter — without losing your security deposit. This guide walks you through exactly how to do it.
Understanding the Two Types of Noise You’re Fighting
Before you spend a single dollar, it helps to understand what you’re actually dealing with. Not all noise travels the same way, and treating the wrong type of noise with the wrong solution is a fast way to waste money.
Airborne Noise
Airborne noise is exactly what it sounds like — sound that travels through the air and then through walls, doors, and windows. Conversations, TV audio, music, and barking dogs all fall into this category. This type of noise is generally easier to treat because it can be absorbed or blocked before it ever reaches your ears.
Impact Noise
Impact noise is caused by physical vibrations — footsteps, furniture being dragged, something being dropped on the floor above you. It travels through the building’s structure itself, which makes it significantly harder to treat from inside your apartment. You won’t eliminate impact noise entirely with renter-friendly methods, but you can reduce how much of it you hear.
Most bedroom noise complaints involve a mix of both. The strategies below address both types wherever possible.
Start With the Walls: Your Biggest Surface Area
Walls are the primary entry point for airborne noise in most apartments. Thin drywall, hollow stud cavities, and shared party walls between units offer almost no acoustic resistance on their own. Fortunately, there are several renter-friendly ways to add mass and absorption without permanent modifications.
Add Mass to Shared Walls
Sound needs mass to stop it. The heavier and denser a barrier is, the harder it is for sound waves to pass through. One of the most effective materials for this purpose is Trademark Soundproofing Mass Loaded Vinyl. MLV is a dense, flexible sheeting material that you can hang directly on a wall like a curtain, or layer behind furniture and bookshelves to add blocking power without drilling into studs. A single layer adds significant mass, and it can be removed when you move out. For shared walls with particularly noisy neighbors, this is one of the highest-impact investments you can make.
Use Acoustic Panels for Absorption
While mass blocks sound from entering, acoustic panels absorb sound that’s already in the room — reducing echo, reverberation, and the overall noise energy bouncing around your space. For bedrooms where aesthetics matter, rigid acoustic panels are far more visually appealing than bare foam. The Art3d Wood Slat Acoustic Panels in Walnut are a standout option here. They look like high-end wall décor, but the slotted wood design and acoustic backing material actually do real work absorbing mid and high-frequency sound. Many renters use these as a feature wall without their landlord ever suspecting they’re functional soundproofing.
Fill the Wall With Furniture Strategically
Don’t underestimate what you already own. Bookshelves packed with books, wardrobes filled with clothing, and even dense fabric wall hangings all add mass and absorption to a wall. Place your heaviest furniture against the wall you share with a noisy neighbor. It won’t solve the problem entirely, but it’s free and surprisingly effective as a first layer of defense.
Tackle the Ceiling and Floor
Area Rugs and Underlayment for Floors
If you’re on an upper floor, a thick area rug with a quality rug pad underneath significantly reduces the impact noise you send downward — which is courteous to your neighbors — and helps dampen sound within your room. If you’re dealing with noise coming up from below, the same setup adds a small but meaningful absorption layer. Look for rugs with a high pile and add a dense rubber or felt rug pad underneath for maximum effect.
Budget Acoustic Foam for Practice or High-Noise Spots
If you have a specific corner of your bedroom that acts as a noise hotspot — maybe directly below a noisy upstairs neighbor’s bathroom, or in a corner that amplifies bass — acoustic foam panels can help absorb that concentrated sound energy. The GUERRI Acoustic Foam Wedge Panels 36-pack gives you a large quantity of panels at a budget-friendly price, which is ideal if you want to cover a significant portion of the ceiling or a problem wall. They’re lightweight, easy to install with removable strips, and can be taken down without damage.
Don’t Ignore the Door
Interior apartment doors are often the weakest link in the entire room. Most are hollow-core, which means they’re essentially cardboard sandwiched between two thin wood panels. Sound passes through them with almost no resistance. Here’s how to fix that without replacing the door:
- Door sweep: Install a heavy-duty door sweep along the bottom of your bedroom door to seal the gap where sound flows freely underneath.
- Weatherstripping: Apply self-adhesive weatherstripping foam tape around the door frame on all three sides. This seals the small gaps that make a huge difference for airborne noise.
- Door draft stopper: A simple fabric draft stopper rolled against the base of the door costs next to nothing and immediately reduces the sound coming in from hallways.
- Heavy curtain over the door: Hanging a thick, floor-length curtain over your bedroom door adds absorption and mass simultaneously. It’s renter-friendly and can look intentional as part of your décor.
Windows: Sealing and Softening
Windows are typically the thinnest barrier between you and outdoor noise. Street traffic, pedestrians, and outdoor HVAC units can make a bedroom feel like it’s in the middle of a freeway. Before buying anything, inspect your windows carefully.
Seal Gaps First
Acoustic caulk or clear weatherstripping foam applied around window frames can close the micro-gaps that let in a surprising amount of sound. This is a low-cost fix that delivers noticeable results, especially in older apartment buildings where window frames have shifted over time.
Heavy Curtains or Soundproof Curtains
Standard blinds do nothing for sound. Thick, floor-to-ceiling blackout curtains made with dense fabric add a layer of absorption between you and the window. Look for curtains that extend several inches beyond the window frame on all sides — coverage matters more than thickness alone. True “soundproof curtains” are mostly a marketing term, but heavy thermal blackout curtains genuinely help with mid and high frequency noise reduction.
Acoustic Window Inserts
If your window noise is severe and you’re willing to invest a bit more, removable acoustic window inserts — which sit inside the window frame without any permanent modification — can reduce outside noise significantly. These are reusable and take with you when you move.
White Noise: The Simplest Budget Fix
Sometimes the most practical solution isn’t blocking noise — it’s masking it. A quality white noise machine or even a simple fan running in your bedroom can raise the ambient sound floor enough that your neighbor’s television or the traffic outside becomes inaudible. White noise machines are cheap, portable, and require zero installation. They won’t replace structural soundproofing, but as part of a layered approach, they’re one of the highest-value tools in your kit.
Putting It All Together: A Layered Approach
No single product or technique will make your apartment bedroom perfectly silent. What works is combining multiple strategies so that each layer handles what the previous one missed. A practical starting point for most renters might look like this:
- Seal doors and windows with weatherstripping and door sweeps (low cost, immediate impact)
- Add heavy area rugs with thick pads on bare floors
- Hang mass loaded vinyl or stack heavy furniture against shared walls
- Install acoustic panels on problem walls for absorption and aesthetics
- Use a white noise machine at night to mask remaining ambient noise
Work through these steps based on your biggest pain points first, and you’ll notice meaningful improvement before you’ve addressed every surface in the room.
Conclusion
Soundproofing an apartment bedroom on a budget isn’t about finding one magic product — it’s about being strategic with every surface and gap in your room. Walls, floors, ceilings, doors, and windows all contribute to your noise problem, and each one can be improved with renter-friendly solutions. Whether you spend $30 on weatherstripping or $200 on acoustic panels and MLV, every step in the right direction makes your bedroom quieter, more restful, and genuinely livable. Start with what bothers you most, layer your solutions, and you’ll be sleeping soundly sooner than you think.
Frequently Asked Questions
Can I soundproof my apartment bedroom without losing my security deposit?
Yes. The majority of the solutions in this guide are completely renter-friendly. Weatherstripping, door sweeps, area rugs, removable MLV hanging, and acoustic panels attached with removable adhesive strips all leave no permanent damage. Always read your lease and check with your landlord if you’re unsure about a specific modification, but most of these require no drilling or wall alteration whatsoever.
What’s the single best thing I can do to reduce noise in my bedroom today?
Seal your door. A hollow-core interior door with gaps around the frame and at the base is the most common noise entry point in apartment bedrooms. Adding a door sweep to the bottom and weatherstripping around the frame costs under $20 and takes about 15 minutes. The improvement is immediate and noticeable.
Will acoustic foam panels actually block sound from my neighbors?
Acoustic foam absorbs sound — meaning it reduces echo and reverberation inside your room — but it does not block sound from passing through walls. For blocking, you need mass (like mass loaded vinyl or heavy furniture). For reducing the noise that’s already in your room, foam helps. Ideally, you use both strategies together for the best results.
How much should I realistically expect to spend to soundproof a bedroom on a budget?
A meaningful improvement is absolutely achievable for $100–$300, depending on the size of your room and the severity of your noise problem. Prioritize sealing gaps first (cheapest), then add mass and absorption to the worst surfaces. You don’t need to treat every wall, ceiling, and window at once — start where the noise is coming from and build from there.
Affiliate Disclosure: This article contains affiliate links. If you make a purchase through these links, we may earn a small commission at no additional cost to you. This helps support Soundproofing Simplified and allows us to continue creating helpful guides. We only recommend products we genuinely believe will help.