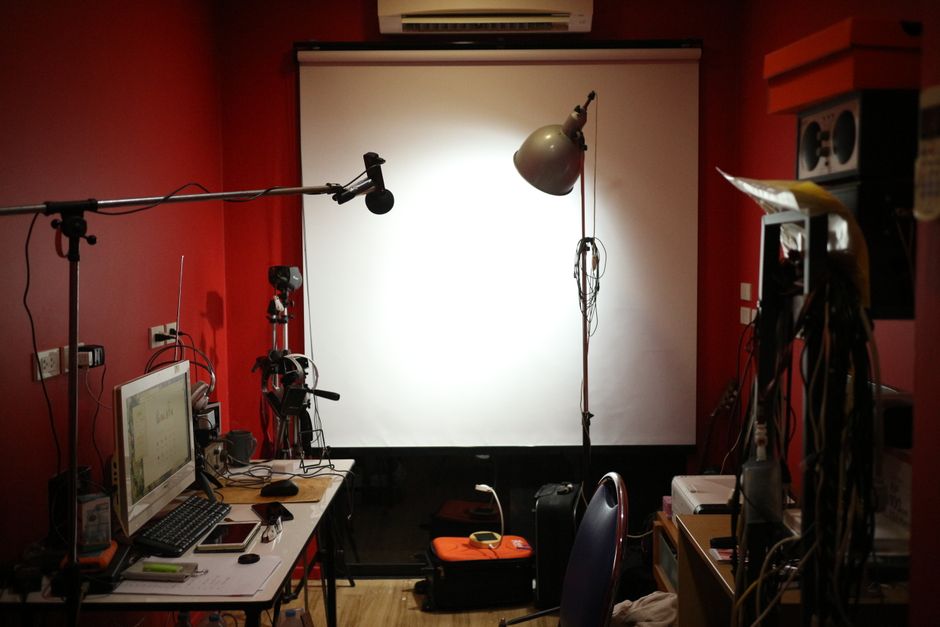
You’ve got the microphone, the interface, and maybe even a decent pair of headphones. But the moment you hit record, reality kicks in — your upstairs neighbor decides it’s the perfect time to rearrange furniture, a truck rumbles past your window, or your own voice bounces off bare walls like you’re recording inside a gymnasium. If you’re trying to build a home podcast studio, noise is your biggest enemy. The good news? You don’t need to gut your walls or spend thousands to fix it. Whether you’re renting an apartment or working with a spare room in your house, this guide walks you through practical, proven soundproofing strategies that actually work.
Understanding the Two Problems You’re Actually Solving
Before you spend a single dollar, it’s worth understanding that “soundproofing a podcast studio” actually involves two distinct problems that require different solutions. Confusing them is one of the most common (and expensive) mistakes people make.
Sound Isolation: Keeping Noise Out
Sound isolation is about blocking external noise from entering your recording space — traffic, neighbors, HVAC systems, footsteps. This requires mass and decoupling. You’re essentially trying to prevent sound waves from traveling through walls, floors, and ceilings into your room.
Acoustic Treatment: Controlling Sound Inside the Room
Acoustic treatment is about controlling how sound behaves inside your space. Hard, parallel walls create reflections and flutter echo that make your recordings sound hollow or “roomy.” Acoustic treatment absorbs and diffuses those reflections so your voice sounds clear and dry — the way professional podcasts sound.
Most home podcasters need to address both. The priority order depends on your situation, but generally: if outside noise is leaking in, tackle isolation first. If the room sounds echoey but is otherwise quiet, focus on treatment.
Step 1: Do a Noise Audit Before You Buy Anything
Spend 10 minutes recording silence in your intended studio space. Play it back with headphones. What do you hear? Identify your specific noise problems:
- Low-frequency rumble (traffic, HVAC, footsteps from above) — hardest to treat, requires mass
- Mid/high-frequency noise (voices, TV from another room, outdoor conversations) — easier to address with sealing and absorption
- Room echo and reverb (your own voice bouncing around) — addressed entirely with acoustic treatment
- Mechanical noise (your own computer fan, air conditioner) — addressed with positioning and isolation pads
Once you know what you’re dealing with, you can stop guessing and start solving.
Step 2: Seal Every Gap (Free and Cheap Wins First)
Sound travels through air, and air finds every gap, crack, and hole in your room. Before buying any panels or foam, do a thorough sealing pass. This is especially important for apartment dwellers where hallway noise, neighbor conversations, and building HVAC are constant issues.
- Door gaps: Install a door sweep on the bottom of your studio door. Add weatherstripping around the door frame. This alone can make a dramatic difference.
- Electrical outlets: Foam outlet gaskets (under $5 for a pack) reduce sound transmission through outlet boxes in shared walls.
- Windows: If you have a window in your studio, heavy blackout curtains add a layer of sound absorption. For serious noise, consider a window plug — a piece of mass loaded vinyl or dense foam cut to fit the window frame during recording sessions.
- HVAC vents: These are one of the biggest overlooked culprits. If possible, close the vent during recording sessions and reopen when done.
Step 3: Add Mass to Shared Walls
For apartment renters dealing with noise coming through shared walls, adding mass is the most effective permanent improvement you can make — and you can do it without major construction. Mass resists the vibration that transmits sound.
One of the most renter-friendly options is Trademark Soundproofing Mass Loaded Vinyl. MLV is a dense, flexible barrier material that can be hung on walls like a curtain or layered behind bookshelves and furniture. Unlike foam or fabric panels, MLV actually blocks sound transmission — it doesn’t just absorb it. You can hang it using adhesive hooks or a curtain rod, making it completely removable when your lease is up.
For best results, layer MLV with bookshelves filled with books, heavy fabric wall hangings, or other dense materials. Each layer adds attenuation. A shared wall lined with a full bookshelf in front of MLV can knock several decibels off intrusive neighbor noise — enough to make a real difference in a recording.
Step 4: Treat the Room with Acoustic Panels
This is where most home podcasters focus their energy — and for good reason. Even if you’ve sealed every gap and added mass to your walls, a bare room will still produce reflections that ruin your recordings. Acoustic treatment transforms a live, echoey space into a controlled recording environment.
Strategic Placement Matters More Than Full Coverage
You don’t need to cover every inch of wall. Focus on:
- First reflection points: Sit in your recording position and have someone hold a mirror flat against the wall. Wherever you can see the microphone in the mirror is a first reflection point — treat those spots.
- Behind and beside the microphone: The area directly behind and to the sides of your mic position needs the most attention.
- Ceiling above the recording position: Often overlooked, ceiling reflections can muddy your recordings.
- Corners: Low-frequency energy builds up in corners. Bass traps in corners help control the low end.
Choosing the Right Acoustic Treatment
For budget-friendly coverage on larger wall areas, the GUERRI Acoustic Foam Wedge Panels 36-pack gives you enough material to treat your primary reflection points without breaking the bank. Foam panels work well for mid and high-frequency absorption — which is exactly the range where vocal recordings suffer most from reflections. Mount them at ear height around your recording position.
If aesthetics matter to you (and let’s be honest — a good-looking studio makes you want to actually use it), consider upgrading some or all of your treatment to something that doubles as wall decor. The Art3d Wood Slat Acoustic Panels in Walnut are a standout option here. These panels combine real wood veneer slats with an acoustic felt backing, providing genuine sound absorption while looking genuinely beautiful. They’re particularly effective at breaking up parallel wall reflections through their slatted, diffusive surface. If you’re doing video podcasting or live-streaming, these panels photograph and look professional on camera — something standard charcoal foam simply can’t claim.
Step 5: Address Floors and Ceilings
Floors and ceilings are often ignored in podcast studio setups but matter significantly — especially in apartments.
Floors
Hard floors reflect sound upward into your recording space. A large, thick area rug under your recording desk absorbs floor reflections and also reduces impact noise you might be sending down to a neighbor below. For apartment dwellers, this is a courtesy as much as a sonic improvement. Add a rug pad underneath for additional thickness and decoupling.
Ceilings
If you can’t treat the ceiling with panels, position a moving blanket, acoustic panel, or even a thick comforter above your recording position using a simple curtain rod or ceiling hooks. Some podcasters build a portable “reflection filter” using a curved panel that mounts directly to a mic stand — these are highly effective and completely portable.
Step 6: Manage Mechanical Noise
Your recording environment might be perfectly treated, but if your computer fan sounds like a jet engine, you still have a problem. A few practical fixes:
- Move your computer tower to a nearby closet or adjacent room and run a long USB cable to your interface
- Place your computer on an anti-vibration pad to reduce desk-transmitted rumble
- Record when your HVAC cycles off, or point the vent away from your recording position
- Use a microphone with good rear rejection (cardioid pattern) to naturally reduce ambient room noise pickup
Putting It All Together: A Realistic Setup by Budget
Under $100 (Renters, Minimal Commitment)
Weatherstripping and door sweep, acoustic foam panels on primary reflection points, a thick rug, and blackout curtains over windows. This alone will meaningfully improve your recordings.
$100–$300 (Serious Home Studio)
Add MLV on your most problematic shared wall, expand your acoustic foam coverage, and consider upgrading one or two wall sections to wood slat acoustic panels for both aesthetics and performance. At this level, your studio will sound noticeably professional.
$300+ (Dedicated Home Studio Space)
At this budget, you can fully treat your room, add proper bass traps in corners, use MLV on multiple walls, and invest in higher-end acoustic panels throughout. The result will rival purpose-built studio spaces.
Conclusion
Soundproofing a home podcast studio isn’t about perfection — it’s about solving your specific problems with the right tools in the right order. Start by identifying your actual noise issues, seal the easy gaps first, add mass where you need to block sound transmission, and treat your room acoustics to control reflections. Whether you’re a renter with a tight budget or a homeowner ready to invest in a proper setup, the path to clean, professional-sounding recordings is completely achievable. Every step you take — even just a door sweep and a rug — will show up in the quality of your final product. Start where you can, and build from there.
Frequently Asked Questions
Does acoustic foam actually block sound from entering a room?
No — this is one of the most common misconceptions in home studio setups. Acoustic foam absorbs sound reflections within a room, improving the sound of your recordings. It does not block external noise from entering. To block outside sound, you need mass (like mass loaded vinyl or dense drywall) and proper sealing of gaps and cracks.
Can I soundproof a podcast studio in an apartment without damaging walls?
Yes. Adhesive-backed panels, removable mounting strips, curtain rod-mounted MLV, free-standing panel frames, and furniture arrangements can all meaningfully improve your recording environment without any permanent wall modifications. Always check your lease and use removable adhesive solutions where possible.
How much soundproofing do I actually need for podcasting?
That depends on your noise floor and microphone sensitivity. A dynamic microphone (like the popular Shure SM7B or similar) is naturally less sensitive to ambient room noise than a condenser microphone, giving you a bit more flexibility. As a general rule, if you can hear the noise on playback, listeners will too. Focus on reducing noise until it’s genuinely inaudible at normal listening levels.
What’s the single biggest improvement I can make for under $50?
Install a door sweep and door weatherstripping kit on your studio door, and place a thick area rug in your recording space. These two simple steps address two of the most common sources of both intrusive noise and room reflections, and they’re completely renter-friendly. Many podcasters are surprised at how much this alone improves their recordings.
Affiliate Disclosure: This article contains affiliate links. If you make a purchase through these links, we may earn a small commission at no additional cost to you. This helps support Soundproofing Simplified and allows us to continue creating helpful guides. We only recommend products we genuinely believe will help.