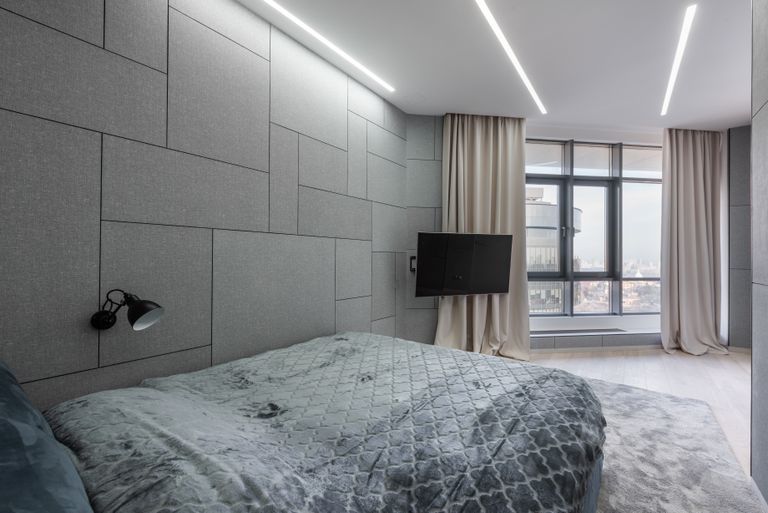
In urban living environments, excessive noise from upstairs neighbors can significantly disrupt daily life. The best white noise machines for apartments serve as an effective solution to stop upstairs neighbor noise and reduce impact noise on the ceiling. By incorporating these devices into your living space, you can enhance apartment ceiling soundproofing and create a more tranquil atmosphere. This comprehensive buyer’s guide for 2025 will assist you in selecting the ideal white noise machine tailored to your needs. Selecting the right white noise machine can significantly mitigate disturbances caused by consistent noise from upper floors. These devices not only mask unwanted sounds but also contribute to a more peaceful living environment. In this buyer’s guide, we will explore various options that excel in noise cancellation, providing you with insights to enhance your apartment’s soundproofing capabilities. With the right choice, you can effectively create a sanctuary free from the disruptions of daily life above. If you’re reading this, you probably know exactly what we’re talking about. That constant thump thump thump of footsteps from the apartment above. The sound of furniture dragging at 2 AM. Kids running back and forth. Every. Single. Day. To achieve a soundproof apartment ceiling from footsteps, understanding these nuisances is crucial.
Impact noise from upstairs neighbors is one of the most frustrating apartment problems because it’s so invasive and difficult to control. Unlike airborne noise (voices, TV, music) that can be managed with basic soundproofing, impact noise travels directly through your building’s structure, making it far more challenging to block.
But here’s the good news: while you can’t eliminate footsteps completely without access to the upstairs apartment, there are proven methods that can significantly reduce the noise and make your living situation tolerable. Some solutions cost under $50 and take an afternoon to implement. Others require more investment but deliver dramatic results in achieving a soundproof apartment ceiling from footsteps.
Why Footsteps Are So Hard to Block (The Physics)
Before diving into solutions, understanding why ceiling impact noise is so difficult helps you choose the right approach.
The problem with structure-borne noise:
When your upstairs neighbor walks across their floor, the impact creates vibrations that travel through the floor joists, ceiling materials, and building structure directly into your space. This is called “structure-borne” or “impact” noise, and it’s fundamentally different from airborne noise.
Think of your ceiling as a drum. When someone walks upstairs, they’re essentially hitting that drum with each step. The vibrations travel through the rigid connection between their floor and your ceiling, transmitting the sound energy directly into your apartment.
Why traditional soundproofing doesn’t work:
Most soundproofing methods (acoustic panels, curtains, sealing gaps) are designed for airborne noise—sound waves traveling through air. These solutions do little for impact noise because the sound isn’t traveling through air gaps; it’s traveling through the solid structure of the building itself.
What actually works:
To reduce footsteps from above, you need to either:
- Decouple your ceiling from the structure (break the vibration pathway)
- Add mass to dampen the vibrations before they reach you
- Absorb impact at the source (ideally upstairs)
- Mask the sound with white/brown noise so it’s less noticeable
The most effective solutions combine multiple approaches.
Realistic Expectations: What You Can Actually Achieve
Let’s be honest about what’s possible when trying to create a soundproof apartment ceiling from footsteps:
Without upstairs neighbor cooperation:
- Best case: 30-50% reduction in perceived noise
- You’ll still hear footsteps, but they’ll be less jarring
- Cheap solutions ($50-$200) provide 15-30% improvement
- Expensive solutions ($500-$2000) provide 30-50% improvement
With upstairs neighbor cooperation:
- Best case: 60-80% reduction in perceived noise
- Adding rugs and pads upstairs is 3-4x more effective than ceiling treatments
- Combined approach (upstairs + downstairs) delivers best results
Important: Complete elimination is nearly impossible without major construction. The goal is making the noise tolerable, not perfect silence.
For those seeking a practical solution, the ultimate goal is to establish a soundproof apartment ceiling from footsteps.
Method 1: Talk to Your Upstairs Neighbor (Most Effective, Free)
Yes, this is obvious. But it’s also the single most effective solution if you can make it work.
Why this matters:
One thick rug pad upstairs reduces impact noise more effectively than $1,000 worth of ceiling treatments in your apartment. Solving the problem at the source—where the impact happens—is always more effective than trying to block the vibrations after they’re already in the structure.
How to approach it:
Don’t do this:
- “Your footsteps are driving me crazy!”
- “Can you walk quieter?”
- “I can hear every step you take”
Do this instead:
- “Hey, I wanted to check in about something. I’m hearing a lot of impact noise coming through the ceiling—footsteps and furniture sounds. It’s just how these buildings are built with the thin floors. I know you’re not doing anything wrong, but I wanted to see if we could work together on a solution?”
What to suggest:
- Offer to split the cost of a good rug and padding
- Send them links to specific thick rug pads that help impact noise
- Explain that it benefits them too (warmer floors, more comfortable)
- Mention that footsteps are normal, it’s just the building construction
BAGAIL Felt and Natural Rubber Backing Rug Pads Non-Slip
What they need: High-density rubber rug pad, at least 1/2 inch thick, covering high-traffic areas (walkways, living room, bedroom)
Cost split suggestion: $100-$200 for quality rug pad covering main areas—offer to pay half
Success rate: About 50% of reasonable neighbors will help once they understand the issue and that you’re being cooperative rather than accusatory.
Method 2: Acoustic Ceiling Tiles with Adhesive (Best Budget Option)
If talking to your neighbor doesn’t work or isn’t an option, acoustic ceiling tiles offer the best bang for your buck.
What they are: Lightweight foam or fiberglass tiles that attach directly to your existing ceiling with adhesive. They add mass and provide some sound absorption, slightly reducing the intensity of footsteps.
How they help:
- Add 3-8 dB of impact noise reduction
- Also reduce echo/reverb in your room (makes remaining noise less harsh)
- Some absorption of higher-frequency impact sounds
- Minimal decoupling effect from adhesive layer
What to look for:
- 1-2 inch thick tiles (thicker is better)
- High-density foam or fiberglass construction
- Beveled edges for seamless appearance
- Peel-and-stick adhesive backing (easier installation)
- Cover at least 50-70% of ceiling for noticeable effect
Installation requirements:
- Clean, smooth ceiling surface
- 4-6 hours for average room
- Removable with heat gun (mostly renter-friendly)
- Can paint over some types
Acoustic Panels Sound and FIre Proof by SODOCT
Art3d Acoustic Drop Ceiling Tiles Soundproof
What you’ll pay: $1.50-$3 per square foot ($150-$300 for average bedroom)
Effectiveness rating: 2/5 for impact noise, but also improves room acoustics
Renter-friendly: 4/5 (removable but may leave residue)
Method 3: Resilient Channels with Drywall (Most Effective Permanent Solution)
This is the gold standard for impact noise reduction, but it’s expensive and permanent.
What it is: Metal channels that attach to your ceiling, with new drywall mounted to the channels instead of directly to the ceiling joists. This creates a “floating ceiling” that’s partially decoupled from the structure, dramatically reducing vibration transfer.
How it works: The resilient channels flex slightly when vibrations travel through, absorbing energy before it reaches the new drywall layer. This breaks the direct connection between the upstairs floor and your living space.
Performance:
- 15-25 dB reduction in impact noise (huge improvement)
- Also blocks airborne noise (voices, TV, music)
- Permanent solution that adds value to the space
- Most effective method available without accessing upstairs apartment
Installation requirements:
- Professional installation recommended ($2,000-$4,000 total)
- Loses 2-3 inches of ceiling height
- Requires painting/finishing
- Permanent modification (landlord permission required)
- 2-4 day installation for average room
Cost breakdown:
- Materials: $3-$5 per square foot
- Labor: $8-$15 per square foot
- Total: $11-$20 per square foot ($1,300-$2,400 for 12×12 room)
Trademark Soundproofing Resilient Metal Hat Channel
Effectiveness rating: 5/5 for impact noise
Renter-friendly: 0/5 (permanent modification)
When this makes sense:
- You own the unit or have long-term lease
- Impact noise is severe and constant
- Other methods have failed
- Budget allows for significant investment
Method 4: Mass Loaded Vinyl (MLV) Ceiling Installation
MLV is a dense, flexible material that adds significant mass to your ceiling without much thickness.
What it is: A heavy vinyl sheet (1-2 pounds per square foot) that hangs or attaches to your ceiling, adding mass that dampens vibrations.
How it helps:
- Adds substantial mass without losing much ceiling height
- 8-15 dB reduction in impact noise
- Also blocks some airborne sound
- Can be combined with acoustic tiles for better results
Installation options:
Option A: Direct attachment (more effective)
- MLV attached directly to ceiling with adhesive/staples
- Covered with acoustic tiles or fabric for appearance
- More permanent, harder to remove
Option B: Hanging system (more renter-friendly)
- MLV hung from ceiling with clips/tracks
- Can be removed without damage
- Slightly less effective than direct attachment
What to look for:
- 1-2 pounds per square foot weight
- Full room coverage for best results
- Professional installation recommended (heavy material)
- Combine with decorative covering
VinylX Reinforced Mass Loaded Vinyl Heavy Duty Soundproof Barrier for Walls
What you’ll pay:
- Material: $2-$3 per square foot
- DIY installation: Material cost only ($240-$360 for 12×12 room)
- Professional: $8-$12 per square foot total ($1,000-$1,500 for 12×12 room)
Effectiveness rating: 3.5/5 for impact noise
Renter-friendly: 2/5 (depends on installation method)
Pro tip: MLV works better when combined with an air gap (hanging) or covered with acoustic tiles.
Method 5: Drop Ceiling Installation (Balanced Approach)
Installing a drop ceiling creates an air gap and adds mass, providing decent impact noise reduction with moderate cost and effort.
What it is: A suspended ceiling grid that hangs 3-6 inches below your existing ceiling, with acoustic tiles filling the grid. Creates an air gap that helps absorb vibrations.
How it helps:
- 10-15 dB impact noise reduction
- Air gap absorbs some vibration energy
- Acoustic tiles add mass and absorption
- Hides ugly ceilings while soundproofing
What you’ll need:
- Suspended ceiling grid system
- Acoustic ceiling tiles (high-NRC rating)
- 3-6 inch drop from existing ceiling
- Basic carpentry skills for DIY installation
Installation requirements:
- Loses 3-6 inches of ceiling height
- 1-2 days for DIY installation (average room)
- Professional installation available
- Semi-permanent (removable but time-consuming)
Cost breakdown:
- Materials: $3-$5 per square foot
- DIY installation: Material cost only ($360-$600 for 12×12 room)
- Professional: $8-$12 per square foot ($960-$1,440 for 12×12 room)
VIVO Acoustic Dual Layer Ceiling Waffle Panel
Effectiveness rating: 3/5 for impact noise
Renter-friendly: 1/5 (requires landlord permission, semi-permanent)
Bonus benefits:
- Easy access to ceiling utilities (plumbing, wiring)
- Can add recessed lighting
- Covers existing ceiling imperfections
- Better than original ceiling aesthetically
Method 6: Sound Deadening Underlayment (If You Have Access Above)
If you can access the upstairs apartment (with permission), installing sound deadening underlayment is incredibly effective.
What it is: Thick rubber or foam underlayment that goes under flooring upstairs, specifically designed to absorb impact energy before it transfers to the structure.
How it helps:
- 18-25 dB reduction in impact noise (extremely effective)
- Solves problem at the source
- Relatively affordable
- Improves sound quality upstairs too
Installation requirements:
- Requires access to upstairs unit
- Flooring must be removed (laminate, hardwood, tile)
- Professional installation recommended
- 1-3 days depending on room size
What to look for:
- IIC (Impact Insulation Class) rating of 65+
- 5-8mm thickness
- Designed specifically for impact noise (not just padding)
- Moisture barrier if needed
Cost breakdown:
- Material: $1-$2 per square foot
- Installation: $3-$5 per square foot if combining with flooring replacement
- Total: $4-$7 per square foot ($480-$840 for 12×12 room)
QuietWalk LV Underlayment for Luxury Vinyl, Laminate and Engineered Wood Flooring
Effectiveness rating: 5/5 for impact noise (if you can install it)
When this makes sense:
- You own both units
- Upstairs neighbor is cooperative and planning flooring replacement
- You’re willing to pay for the upgrade
- Maximum effectiveness is worth the access requirement
Method 7: Brown Noise Machine (Immediate Relief, No Construction)
While not true soundproofing, a quality brown noise machine can make footsteps far less bothersome by masking the sound.
What it is: A device that produces low-frequency brown noise, which effectively masks impact sounds like footsteps, door slams, and furniture movement.
How it helps:
- Masks the impact sound so it’s less jarring
- Works immediately (no construction needed)
- Completely renter-friendly
- Affordable and portable
Why brown noise specifically:
- White noise doesn’t mask low frequencies well
- Brown noise has more energy in bass range (similar frequency to footsteps)
- Creates a “rumble” that covers impact sounds
- More effective for footsteps than white or pink noise
What to look for:
- Strong brown noise option (not all machines have it)
- 60-85 dB volume range
- Large speaker for better bass response
- Digital sound generation (non-looping)
Placement for footsteps:
- Position in room center or near where you spend most time
- Elevate slightly (on dresser or nightstand)
- Volume should be just loud enough to mask impacts without being uncomfortable
What you’ll pay: $40-$80
Effectiveness rating: 2.5/5 (doesn’t reduce noise, but makes it more tolerable)
Renter-friendly: 5/5 (completely removable, no installation)
Best for:
- Temporary solution while planning other methods
- Nighttime use for sleeping
- People who can’t modify their apartment
- Budget-conscious renters
Combining Methods for Maximum Impact
The most effective approach uses multiple solutions together:
Budget Combo ($200-$400):
- Acoustic ceiling tiles (50% coverage)
- Brown noise machine for sleeping
- Conversation with upstairs neighbor
- Expected result: 25-40% reduction
Mid-Range Combo ($800-$1,500):
- MLV ceiling layer
- Acoustic tiles over MLV
- Brown noise machine
- Thick rug pad from upstairs neighbor (if possible)
- Expected result: 40-60% reduction
Premium Combo ($2,500-$4,000):
- Resilient channels with new drywall
- OR drop ceiling with acoustic tiles
- Brown noise machine as backup
- Upstairs floor underlayment (if accessible)
- Expected result: 60-80% reduction
DIY vs. Professional Installation
When DIY makes sense:
- Acoustic ceiling tiles (simple adhesive application)
- Brown noise machine (plug and play)
- Hanging MLV (with helper, moderate difficulty)
When to hire a professional:
- Resilient channels with drywall (requires expertise)
- Drop ceiling in large or complex rooms
- MLV installation if you’re not confident (very heavy material)
- Any structural modifications
Cost comparison example (12×12 room):
- DIY acoustic tiles: $200-$300
- Professional acoustic tiles: $500-$800
- DIY drop ceiling: $400-$600
- Professional drop ceiling: $1,000-$1,500
- Professional resilient channels: $2,000-$4,000
Common Mistakes to Avoid
Mistake #1: Expecting complete silence No ceiling treatment will completely eliminate footsteps without major construction and perfect execution. Aim for “tolerable” not “silent.”
Mistake #2: Skipping the upstairs conversation One rug pad upstairs is worth more than hundreds of dollars in ceiling treatments. Always try this first.
Mistake #3: Thin acoustic foam 1/2 inch foam tiles do almost nothing for impact noise. If going this route, use 1-2 inch thick tiles minimum.
Mistake #4: Ignoring air gaps Air gaps between layers (drop ceiling, hanging MLV) significantly improve effectiveness. Direct attachment is less effective.
Mistake #5: Partial coverage Covering 20% of your ceiling won’t help much. Impact noise travels through the entire ceiling structure. Aim for 60%+ coverage minimum.
Mistake #6: Wrong type of noise machine White noise doesn’t mask low-frequency footsteps well. Use brown noise or bass-heavy nature sounds for impact noise.
When to Consider Moving
Sometimes the solution isn’t fixing the noise—it’s finding a quieter living situation.
Consider moving if:
- Impact noise is severe and constant (hours per day)
- Neighbor is uncooperative or hostile
- You can’t afford effective soundproofing solutions
- Noise is affecting your health, sleep, or quality of life significantly
- Building management won’t help
- You’re renting short-term anyway
Top-floor apartments are worth the premium if upstairs noise is your primary issue. The peace of mind and improved quality of life often justify higher rent.
Legal Options and Building Management
If footsteps constitute a nuisance (extremely excessive, late night, violating quiet hours), you may have legal recourse.
Steps to take:
- Document the noise (recordings, noise journal with dates/times)
- Review your lease for quiet enjoyment clauses
- Report to building management in writing
- Request management address the issue
- Check local noise ordinances
- Consider mediation services
- Legal action as last resort (tenant attorney consultation)
Realistic expectations:
- Normal footsteps are not typically violations
- Late-night excessive noise may violate leases
- Documentation is essential for any action
- Resolution is slow and uncertain
Final Recommendations
If you can only do one thing: Have a friendly conversation with your upstairs neighbor about adding a thick rug pad in high-traffic areas. This single action provides more impact noise reduction than any ceiling treatment you can do.
For renters with strict no-modification rules: Invest in a good brown noise machine ($50-$80). It won’t reduce the actual noise, but it makes it dramatically more tolerable, especially for sleeping.
For homeowners or long-term renters: Install resilient channels with new drywall if budget allows. It’s expensive but provides permanent, significant relief from impact noise.
For most people (middle ground): Start with acoustic ceiling tiles (50-70% coverage) plus a brown noise machine. This combo costs $250-$400, is partially reversible, and provides noticeable improvement without major construction.
Remember: Structure-borne impact noise is one of the hardest acoustic problems to solve. A 30-40% reduction in perceived noise often makes the difference between unbearable and tolerable living conditions.
You deserve to feel comfortable in your own home. While eliminating upstairs footsteps completely is unrealistic without major renovation, combining smart soundproofing with sound masking can restore your peace and sanity.
Frequently Asked Questions
Q: Will soundproofing the ceiling stop all footsteps from upstairs? A: No. Impact noise is extremely difficult to block completely. Realistic expectations are 30-50% reduction with good ceiling treatments, or 60-80% if you can treat the floor upstairs.
Q: Are acoustic ceiling tiles worth it for impact noise? A: They provide modest improvement (15-30% reduction) and also improve room acoustics. Worth it as a budget option but not a complete solution.
Q: Can I soundproof the ceiling myself? A: Acoustic tiles and hanging MLV are DIY-friendly. Resilient channels and drop ceilings are best left to professionals unless you have construction experience.
Q: How much does professional ceiling soundproofing cost? A: $2,000-$4,000 for resilient channels with drywall in an average room. $1,000-$1,500 for drop ceiling installation.
Q: Will reporting to management help with footstep noise? A: Unlikely unless the noise is excessive and violates quiet hours. Normal footsteps are not typically considered a lease violation.
Q: What’s the cheapest way to reduce upstairs footsteps? A: A brown noise machine ($50-$80) and a friendly conversation with your neighbor about adding a rug pad upstairs.
Q: How thick do acoustic ceiling tiles need to be? A: Minimum 1 inch thick, preferably 2 inches. Anything thinner provides negligible impact noise reduction.
Q: Will carpeting my apartment help with upstairs noise? A: No. Carpeting on your floor doesn’t affect noise coming through your ceiling. It only reduces noise you create traveling downstairs.
This article contains affiliate links. If you make a purchase through these links, we may earn a small commission at no additional cost to you. This helps support our site and allows us to continue providing helpful soundproofing guides. We only recommend products we believe will genuinely help you solve your noise problems.